If you are facing a problem of low space on your computer then it will be filled with duplicate photos. Duplicate photos occupy lots of space on your computer. Removing duplicate photos will help you to recover space on your computer and you will be able to use it properly.
Also, once the duplicates are cleared then the photos on your computer will be organized and you will not face the problem of finding the pictures you want. You can remove the duplicates manually one by one or you can remove the duplicate using the duplicate finder and remover tool.
Let’s look at the manual steps for removing the duplicates first:
Manually remove duplicate photos:
For removing the duplicates manually, you have to search for all the pictures on your computer and then compare them one by one. Once the duplicates are found you can delete them. In the manual process of deleting the duplicates you have to open different folders and check the pictures stored in them.
If there are duplicates in a folder then you can sort them by name and size so that you can compare the photos easily and then remove the duplicate photos.
Manually removing the duplicate photos will take lots of time as you have to look for the duplicates one by one. However, if you use a duplicate photos finder program then it will scan your computer for the duplicate photos and then delete them for you.
Remove duplicate photos using Duplicate Photos Fixer:
One of the best duplicate finder and remover programs is Duplicate Photos Fixer. You can scan your whole computer using the program and the program will show you duplicate photos. Now from the list of duplicate photos you can easily remove them.
First let’s look at the features of this program:
- User-Interface:
Duplicate Photos Fixer has an easy to use user interface.
Different matching criteria:
Using this program, you can look for similar pictures as well as identical duplicate photos. You can easily change the matching criteria in this program.
Similar match criteria:
This criterion will help you to look for similar looking pictures.
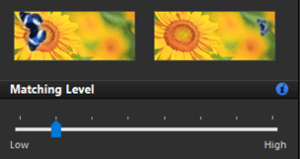
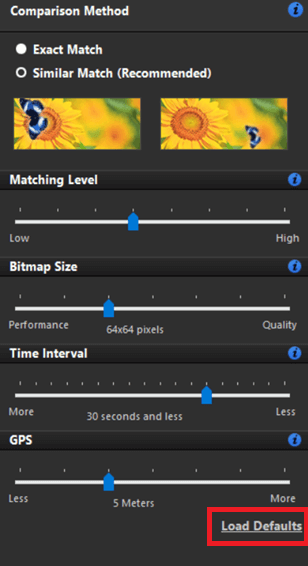
Matching Level = You can change the matching level in the program for finding more or less looking pictures.
Bitmap Size = Pictures are compared on basis of pixels.

Time Interval = This program will compare time taken between the images.

GPS = The pictures will be compared according to its location.

Load Defaults = If you have changed settings and want to revert the settings then you can use Load Defaults button.
Let’s look at the settings of this program:
Other settings in Duplicate Photos Fixer Pro:
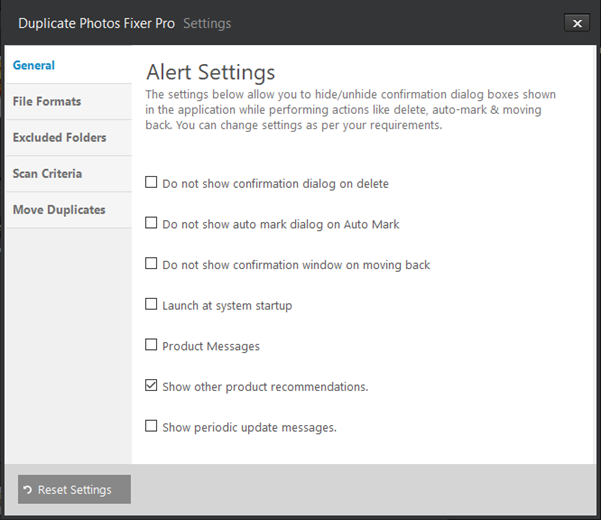
Open the settings to look for more options in this program. You can go to the settings from the top right corner of the program window.
General = From this you can change the settings like if you want to open the program at startup or enable and disable messages and other settings.
- File Format= By default all the file formats are included in the scan list however, you can change it according to your needs.
- Exclude Folders = You can add the folder you do not want to scan in this list.
- Scan Criteria = You can enable and disable the setting to exclude or include time interval or GPS settings in the scan.
- Moving the duplicates to your desired location other than the Recycle Bin.
- You can remove duplicates from both internal and external drives.
- All major file formats are supported.
- Once the duplicates are found you can auto mark the duplicates for deletion.
Now we have looked are the features of this program lets look at the steps below to use Duplicate Photos Fixer for removing duplicate photos from a computer:
STEP 1 – You have to download and install Duplicate Photos Fixer from the link below:
STEP 2 – Launch the program after installing it and then add the location for scanning.
STEP 3 – Once the location is added you have to click on Scan for Duplicates button.
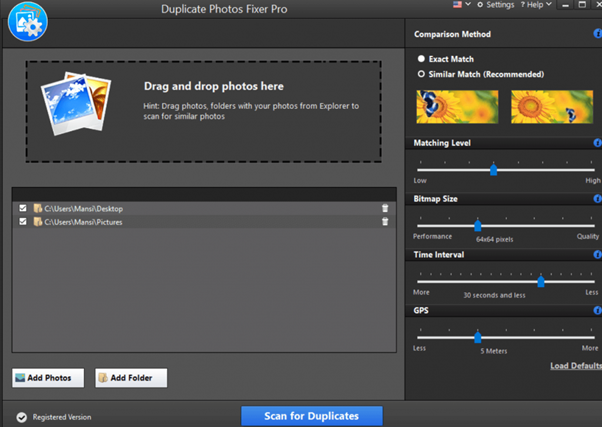
STEP 4 – After completion of the scanning process you will see all the duplicates found by the program according to the criteria you have selected.
STEP 5 – Once the duplicates are found you can preview the duplicates and then mark the duplicates for the deletion. Now you can delete the duplicates easily.
Verdict:
Removing the duplicates manually takes lots of time and effort. Also it will not guarantee the deletion of all the duplicates as you may miss the duplicates. If there are a couple of duplicate photos then you can remove them manually.
However, if there are lots of duplicate photos on your computer then it is advisable to remove the duplicate using duplicate photos finder and remover program. You can use Duplicate Files Fixer for removing duplicate photos from the computer.




![How to Fix [pii_email_57585d6cf4028389f7c9] Error Code? [pii_email_57585d6cf4028389f7c9]](https://www.techwebtopic.com/wp-content/uploads/2022/02/pii_email_57585d6cf4028389f7c9.jpg)


