

Audio issues are common in Windows operating systems. There are several reasons for Realtek sound not working. It can be due to incorrect settings, mute or low volume, unpaired devices, or due to faulty drivers. Before we perform Realtek audio troubleshooting, we need to diagnose the issue if it is due to settings, drivers, or faulty hardware. Hardware issues are extremely rare in Windows.
With the latest release of the Windows 11 Beta version, there have been several updates that caused compatibility issues. A lot of devices encountered issues during this testing phase and Realtek audio is one of them. If all the settings are perfect, we need to ensure that we have the latest Realtek audio drivers installed on our PC. You can manually install them or use the Best Driver Updater Programs to automatically update all the device drivers.
Check Sound Settings
Before you jump on any troubleshooting, ensure that the sound levels are high and it is not on Mute.
Step 1. Right-click on the sound icon in the system tray (Bottom Right on TaskBar).
Step 2. Click on the Open Volume Mixer. Increase the volume level to 100% and select the output device as Speaker Realtek Audio. Close the window.
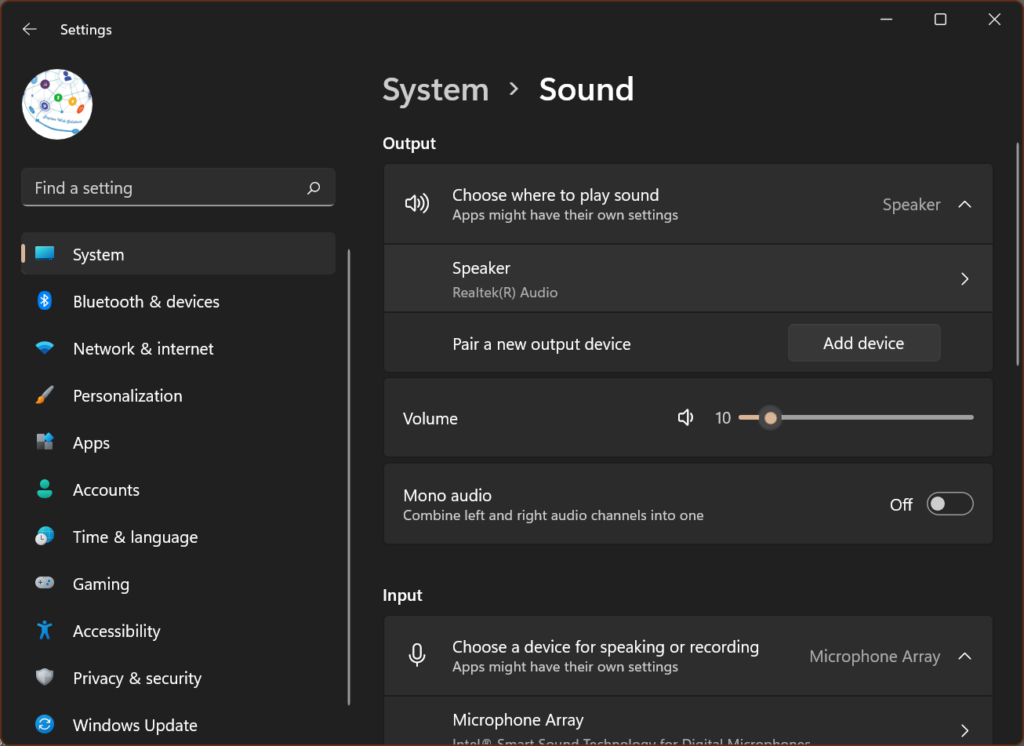
Step 3. Right-click on the sound icons again and select Sound Settings.
Step 4. In the Output section, choose the output device as Realtek or pair another output device to connect with Bluetooth.
Check Connectivity
Checking the connectivity is an important step while troubleshooting Realtek speakers not working on PCs. If you have connected a wired speaker, you need to check the connectivity, power source, and volume button on the speaker. Try unplugging and connecting back to ensure that the power source and the CPU connection are perfect.
Run Audio Troubleshooter
If connections and settings seem to be perfect, it’s time to run the audio troubleshooter. You will find this option in the sound settings window.
Step 1. Right-click on the sound icons again and select Sound Settings.
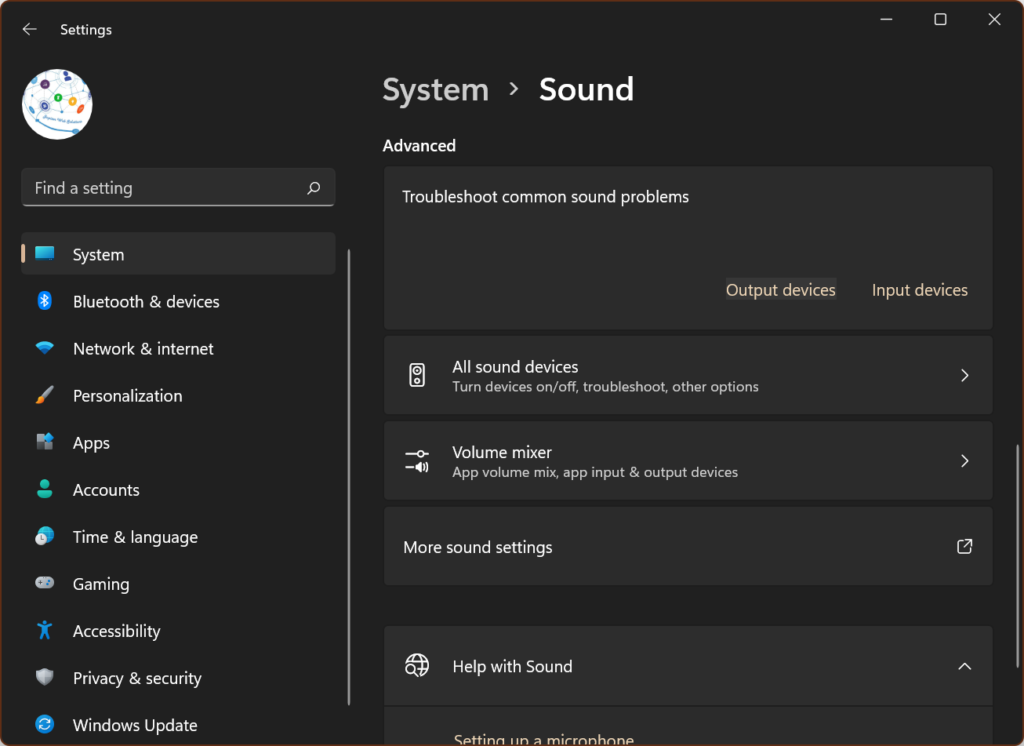
Step 2. Under the Advanced section, you will find troubleshooting common sound problems. Click on the Output Devices link to run the audio troubleshooter.
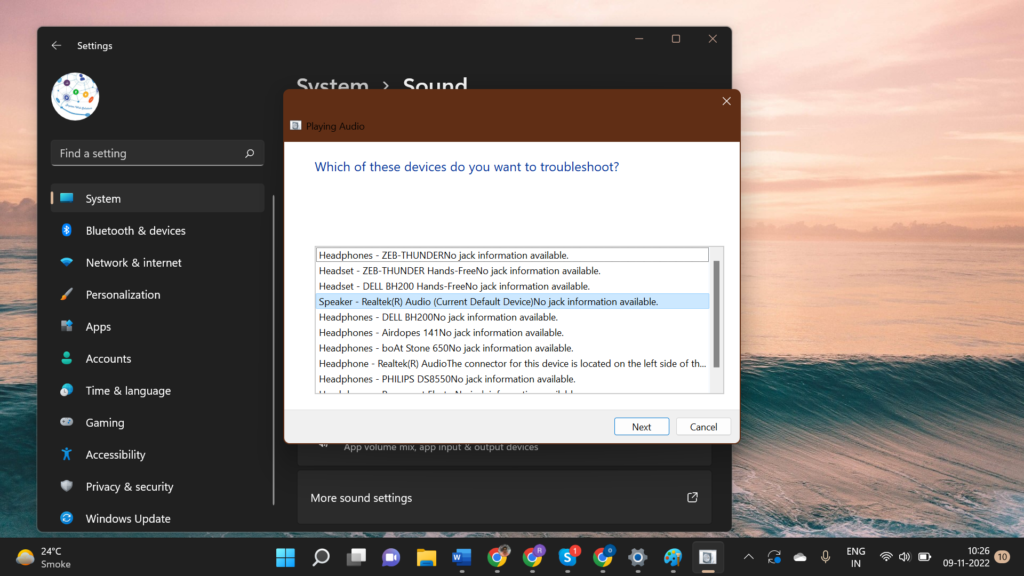
Step 3. If you have used multiple output devices, it will ask you to choose which one to troubleshoot. Select Realtek Speakers and proceed further.
Step 4. If there is any issue found, it will notify you. You can uninstall and reinstall Realtek drivers.
Check For Faulty Drivers
Faulty driver is the biggest reason behind Realtek speakers not working. When a high-definition audio device is not working, the first thing to check is the audio drivers. You can again access the sound settings to check Realtek audio driver problems.
Step 1. Right-click on the sound icons again and select Sound Settings.
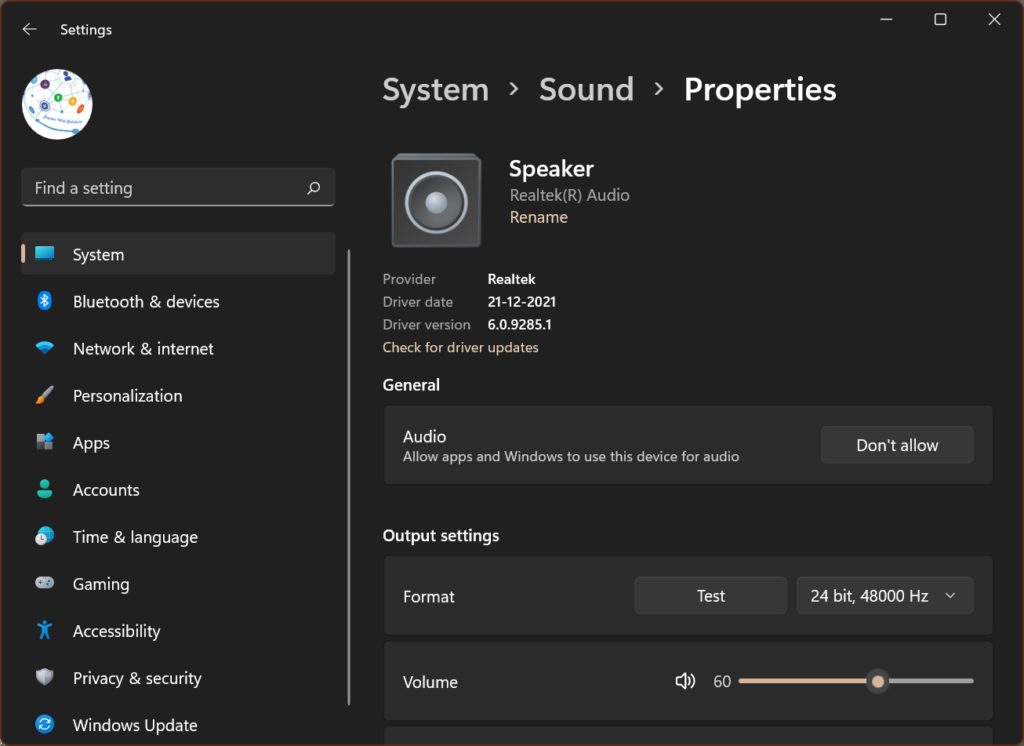
Step 2. Under the Output section, click on Speaker Realtek Audio. It will open the Realtek audio properties window to check the driver date, version, and other Realtek settings.
Step 3. Click on the Check for Driver Updates link to see if there are new drivers available.
Update Realtek Audio Driver
There are several ways to update Realtek audio drivers. If your Realtek sound is not working, drivers are possibly one of the major reasons. You can try any of these tricks that may work to update your audio drivers.
Install Windows Updates
Step 1. Press the Window key, click on Settings, and select Windows Updates.
Step 2. Click the Check for Updates button to scan and find the latest updates.
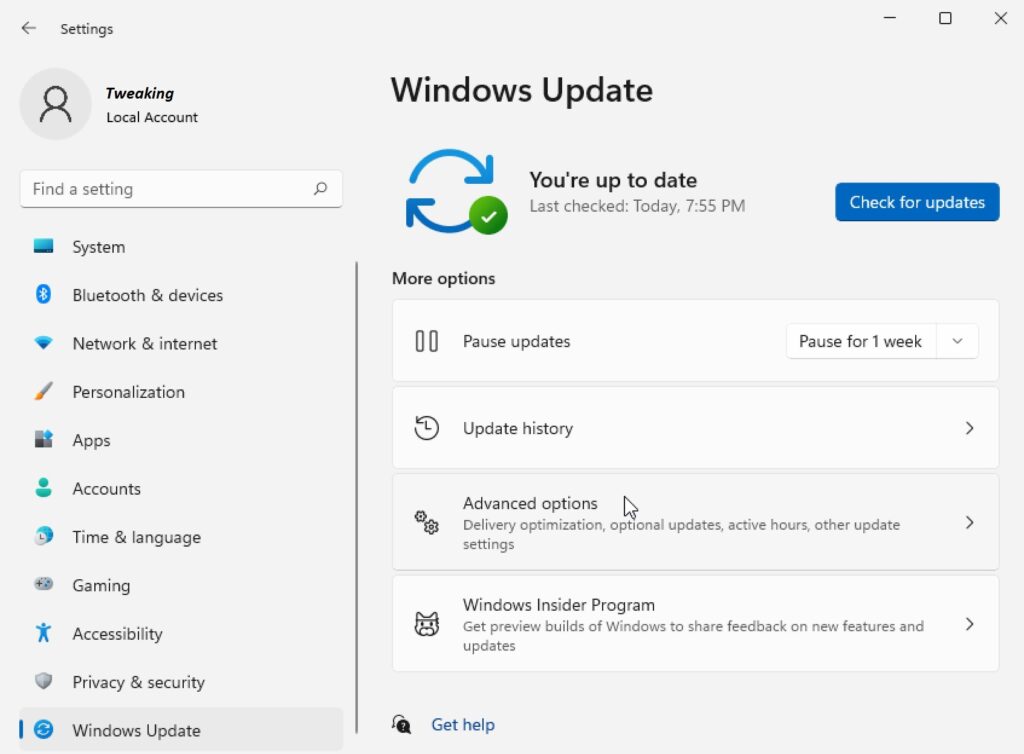
Step 3. Select all found updates, download, and install them on the PC. Restart to check if Realtek audio speakers’ not working issue is fixed.
Download Driver from OEM
Now that you have the driver version, date of release, make, and model, you can download Realtek audio driver from its official website. Compare the versions to ensure that you are downloading the latest version of the Realtek audio driver. Execute the downloaded driver and install it on your PC. Restart to check if you fixed Realtek audio speakers not working.
Update Realtek Audio Driver with Device Manager
Step 1. Press Win + R, type devmgmt.msc, and click the Ok button.
Step 2. On the Device Manager window, click to expand Audio input & output.
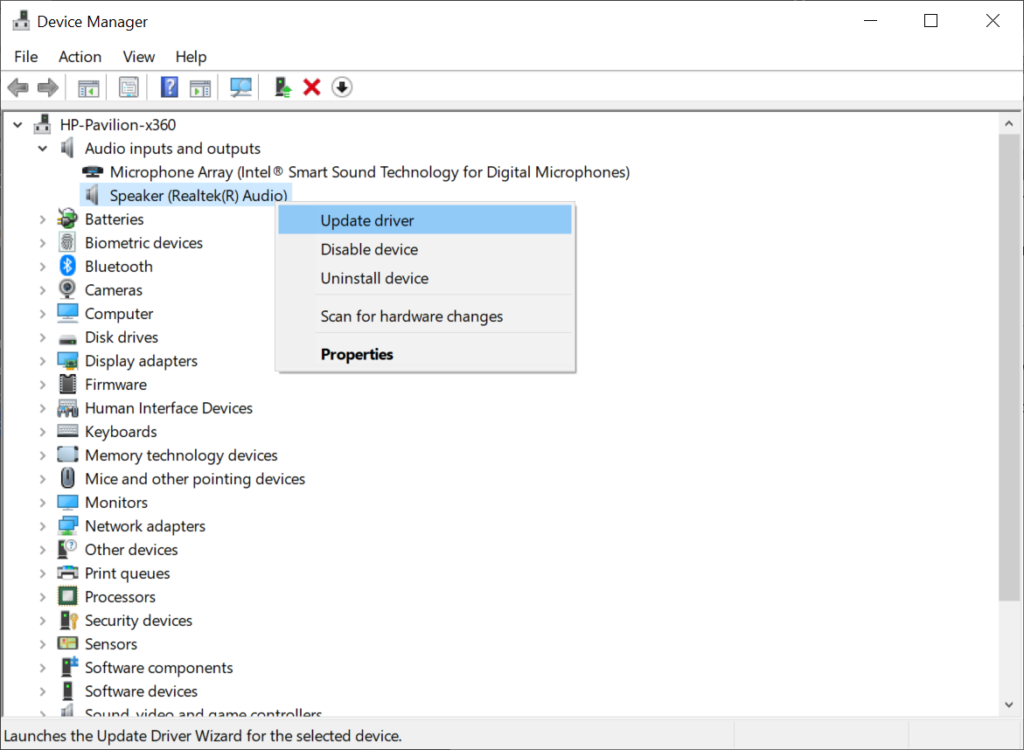
Step 3. Right-click on the Speaker (Realtek Audio) and select the Update Driver.
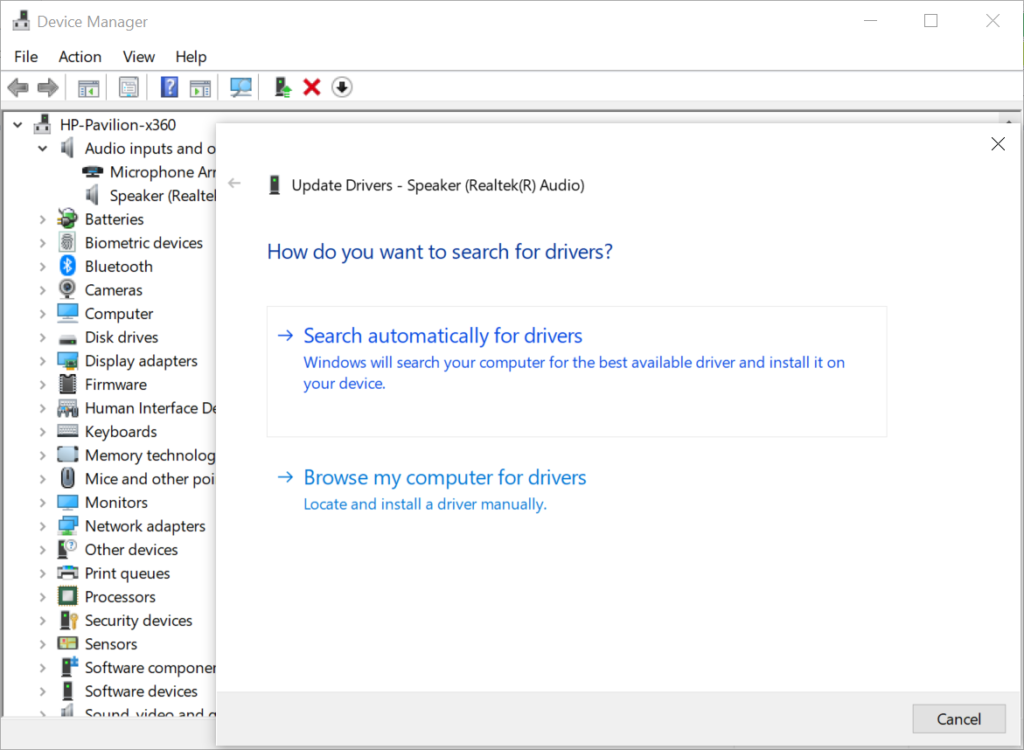
Step 4. Try selecting ‘search automatically for drivers’ if you have installed Windows updates. If it doesn’t fix the Realtek audio driver problem, come back to the same window and select ‘Browse my computer for drivers’ to select the downloaded driver.
Driver Updater Software
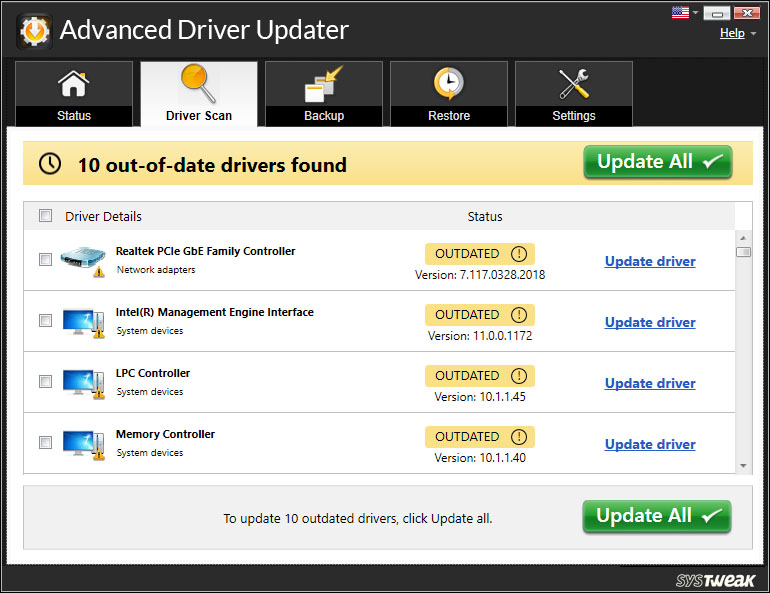
After trying all the above manual steps, if your Realtek sound is not working, it’s time to use one of the Best Driver Updater Software for Windows. The best driver updater software will automatically scan and find all the outdated, corrupt, incompatible, or missing drivers and replace them with the most recent drivers. Not just audio drivers, it can ensure that all the device drivers are updated regularly and there is no driver conflict.
Final Words
Realtek audio driver problems are common and the major reason is always the faulty audio drivers. The above tips and tricks can fix Realtek speakers’ not working issue. You can try the manual methods before using the driver updater software as the last solution.
