
MacOS comes with multiple utilities and tools to check its regular performance and resource usage. Activity Monitor is one of the utilities that showcase the CPU usage and Memory usage on Mac. Mac system monitor can be used to manage memory usage or quit unwanted apps. It is a quick-to-use utility to kill unwanted background processes.
The new MacOS Ventura offers a default icon of Activity Monitor on the Dock. You can quickly figure out unresponsive apps, quit apps, restart apps, check energy usage, or see the real-time CPU usage, disk status, or network monitor on the Dock. It becomes easy to decide if optimization will be enough or if you will need to Upgrade RAM on Mac.
Access Activity Monitor on Mac
There are a few tricks to access Activity Monitor on Mac and check CPU usage on Mac.
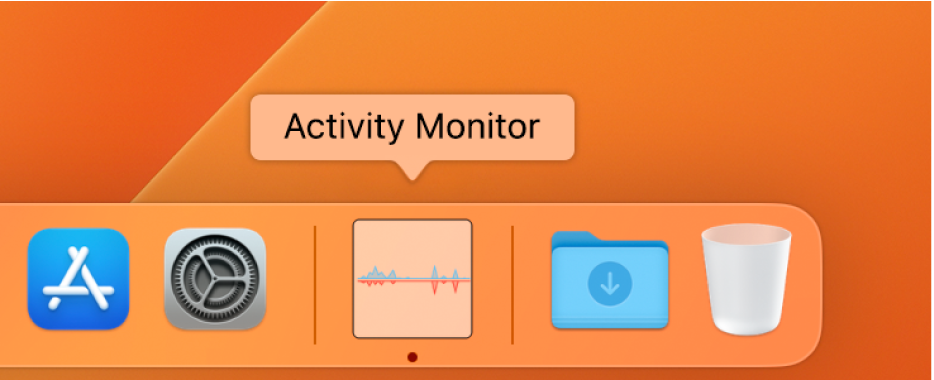
Access Activity Monitor from Dock – If you are using the latest version of Mac (MacOS Ventura), you can click on the Activity Monitor App on the Dock.
Search Activity Monitor – Finder App can also help you quickly find an Activity Monitor and access it. You can simply click on the Finder icon, type Activity Monitor, and hit the Enter key.
Access Activity Monitor from Utilities – This is the place where you can find the icon of the Activity Monitor. Click on the Go menu on the Apple bar and select the Utilities option. Click on the Activity Monitor icon to access the Mac performance monitor.
Quit Unresponsive Apps on Mac
There are times when heavy apps can go unresponsive. Non-responsive apps can get stuck in a loop and you can quit them to restart the app and get it working.
Step 1. Click on the Go menu to access the Utilities option.
Step 2. Double-click on the Activity Monitor icon to access the Mac system monitor.

Step 3. Click on the Memory tab to check the active processes.
Step 4. Click on the Memory Column again to sort apps by high memory usage.
Step 5. Click on the process or app that stopped working or consuming high memory usage.
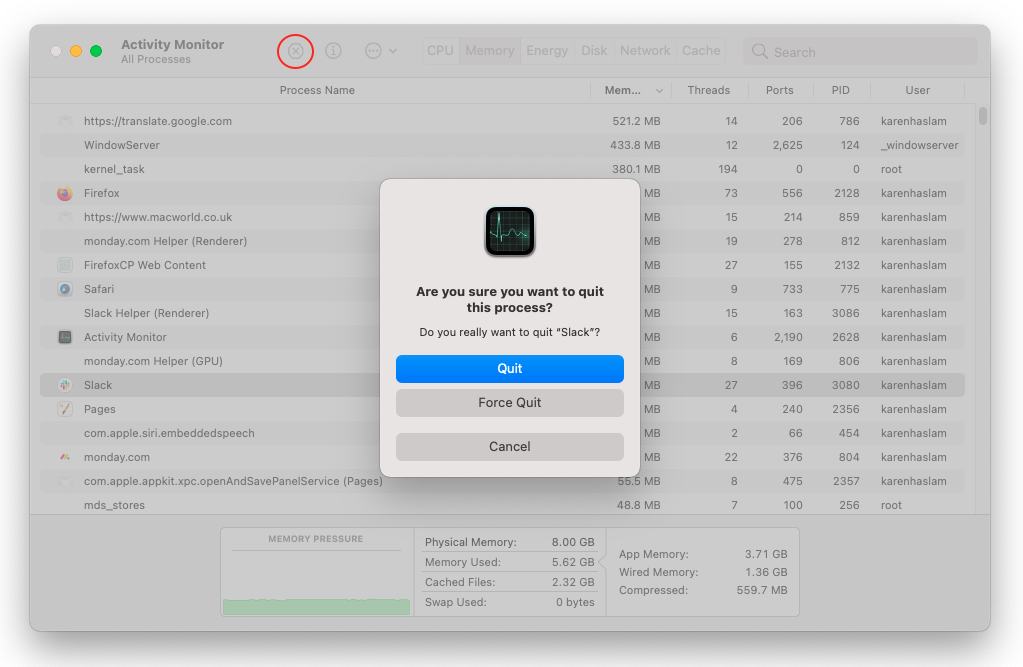
Step 6. Click on the Stop button in the top left corner. Go to the File menu and select Quit. If the app doesn’t quit working with the Quit App option, you can go for the Force Quit option.
Please Note: If you are quitting an app, ensure that you have saved your work and that the app is not open in other user accounts. You may lose any unsaved data.
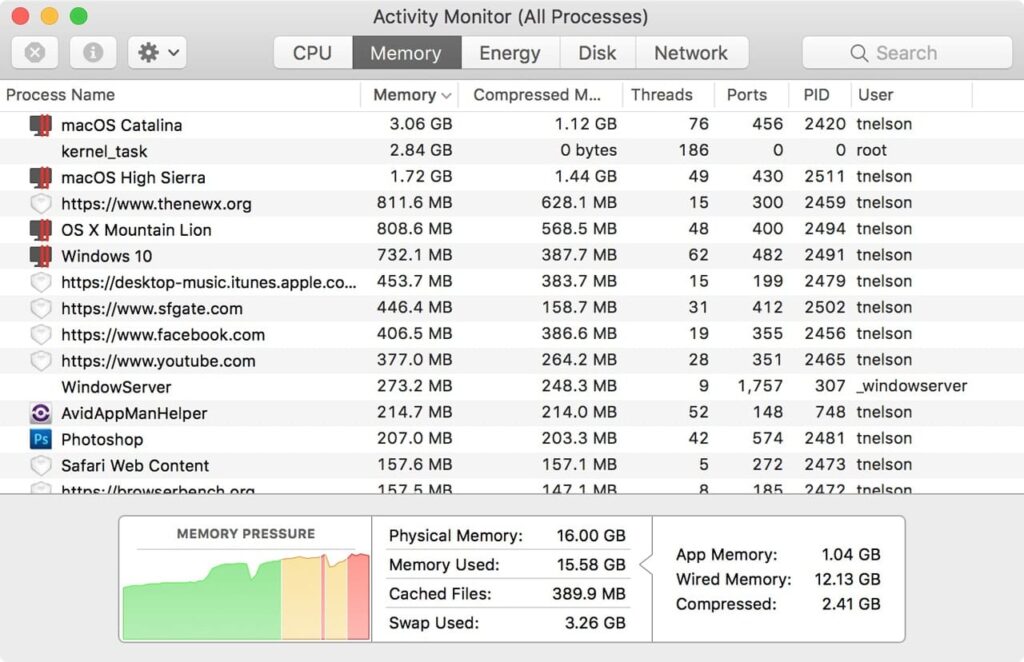
Check Memory on Mac
The Activity Monitor also allows you to check the RAM usage and manage the memory of your Mac. The total available RAM can be checked on the ‘About this Mac’ window however used and available RAM can be checked in the Activity Monitor.
Check Total RAM on Mac
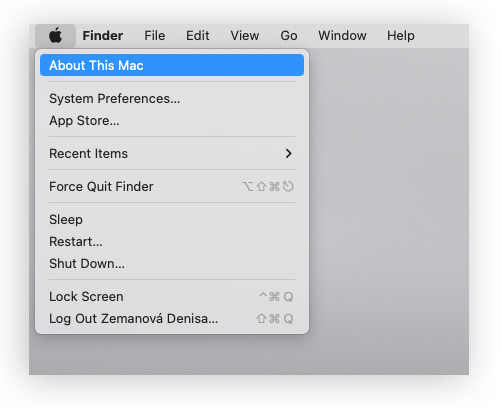
Step 1. Click on the Apple menu and select the ‘About This Mac’ option.
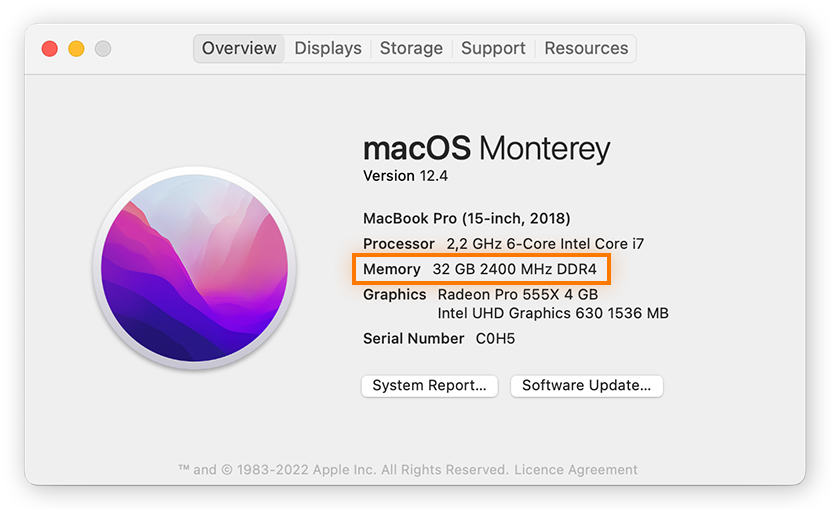
Step 2. On the Overview tab, you can find the total RAM size that came with your Mac and other system details. If your Ram is less than 16GB, you can upgrade your RAM to fix performance issues on your Mac.
Check Available RAM on Mac
Step 1. Click on the Activity Monitor icon on the Dock in the newer version of Mac. If you are still using the older version, you can follow these steps.
Step 2. Click on the Go menu to access the Utilities option.
Step 3. Double-click on the Activity Monitor icon to access the Mac system monitor.
Step 4. Go to the Memory tab to check the used and available RAM on Mac. Here you can decide if you need to add more RAM to your Mac or if quitting apps will be just enough for your device.
Let’s dive deep a little bit into the memory descriptions!
Memory Pressure: This is a graphical representation of how efficiently your Memory is used.
Physical Memory: This is the total amount of Ram installed on your Mac.
Memory Used: This is the amount of Ram your Mac is using right now. It includes App Memory, Wired Memory, and Compressed Memory.
Cached Files: this includes the size of the file cached by your Mac to add up to unused memory and enhance the performance of your Mac.
Check CPU & Disk Usage
Activity Monitor on Mac is also used to check the CPU usage and Disk usage. It is the place where you can check if there is any pressure on the CPU or if the disk storage is almost full.
Step 1. Click on the Activity Monitor icon on the Dock in the newer version of Mac.

Step 2. Go to the CPU tab and check the CPU usage. You can also click on the CPU column to sort programs by CPU usage. You can quit any unwanted process to regain CPU load.
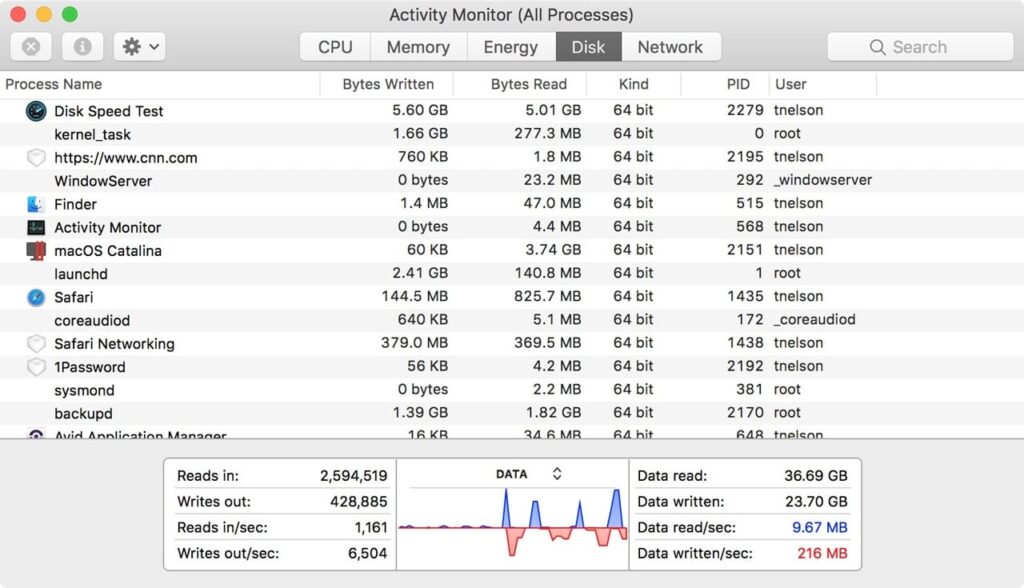
Step 3. Go to the Disk Usage tab to check the data read/write usage on your Mac. you can check different apps and how much disk space is utilized by a particular app.
Final Words
This article on how to use Activity Monitor on Mac has the best tips and tricks to access and make the most out of this Mac performance monitor. We have also disclosed how to quit apps and background processes to regain performance. We have also explored how to use the Mac system monitor to check CPU usage and Disk usage. Keep your Mac optimized for the best performance.
