

We all face this issue where our PC gets slower after upgrading to Windows 10 or after a major update. Thankfully there are easy and quick methods you can use to speed up your PC. In this article, we’ll go with a step-by-step process, giving our recommendations to optimize and improve PC performance. So, let’s get started.
Change Power Options
The power option lets you adjust the power plan on Windows 10. Every power is said to balance by default, but you can change it into a better power plan that favors performance.
Step 1: Go to the search box on the taskbar and search, ‘choose a power plan.’ You will find that it’s set to the Balanced Power Plan by default, but we’re going to change it to the High-Performance Power Plan, which you might not see there yet.
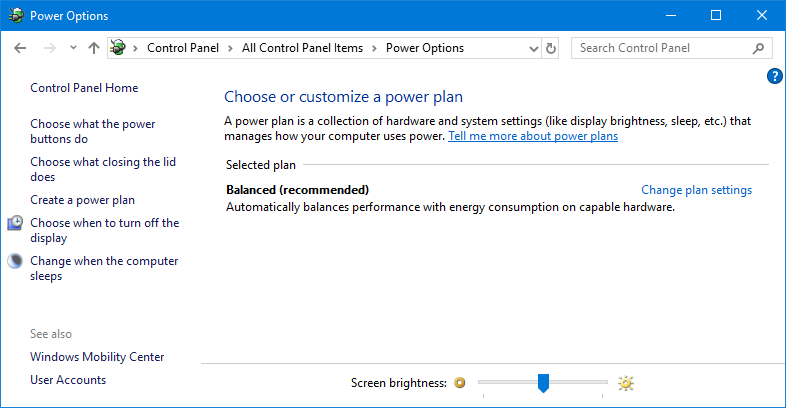
Step 2: If you do not find the High-Performance Power Plan, click on the Show Additional Plans tab, and select High-Performance Power Plan from here.
If it is not available there, you will have to create the High-Performance Power Plan yourself. To make a High-Performance Power Plan, you can follow these steps.
- Click on the Create a Power Plan hyperlink.
- Select High Performance and name it as High-Performance Power Plan.
- Click on the Next button.
There you go, now it will show on the preferred plans, you can choose to enable it. If you want, you can tweak your power plan by going to the ‘Change Plan Settings’ on that particular power plan. These steps are most commonly used to improve Windows 10 performance.
Cleanup C Drive
If your C: Drive gets almost filled up, you will experience severe lag or unresponsiveness on your Windows 10 system. So, we’ll show you the steps to clean your C: Drive to boost your system performance on Windows 10.
Step 1: Go to the File Explorer, right-click on the C: Drive or System Drive, and choose Properties.
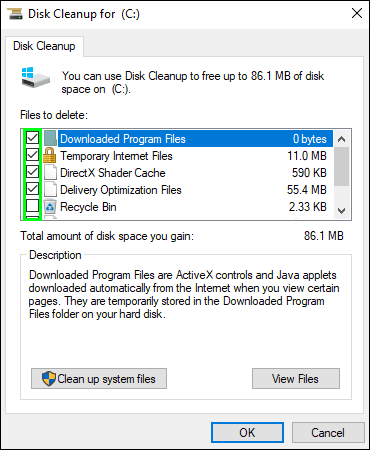
Step 2: Now under the General tab, you will find the Disk Cleanup option. Click on it. It will scan the drive and once you’re there, click on the Cleanup System Files, which will run a deep scan and show you the unwanted files that you can delete. It can be the old updates or the files from the previous Windows build.
Step 3: Once you have selected the unwanted files, click on the OK button and you will be asked for configuration. So, click on the ‘Delete Files’ option. You will find that you freed up a considerable amount of your system drive space.
This will boost your PC performance. To clean furthermore, you can consider cleaning up the Recycle Bin. Recycle Bin uses C: Drive storage to keep the files you have deleted without pressing (Shift + Delete) These files are not permanently deleted.
Disable Unwanted Startup Programs
Most of the programs installed on your Windows 10 are designed to run during your system startup, even if you do not use them on a regular basis. These programs will run in the background forever until you restart your PC. Unfortunately, there are a lot of programs that behave this way. This may cost you a lot of system resources and cause a high lag and response issues. Your Windows may experience the slowest boot time possible with a lot of startup items. You can resolve this issue without a PC booster by following these steps.
Step 1: Right-click on the Task Bar to bring up a menu.
Step 2: Click on the Task Manager option.
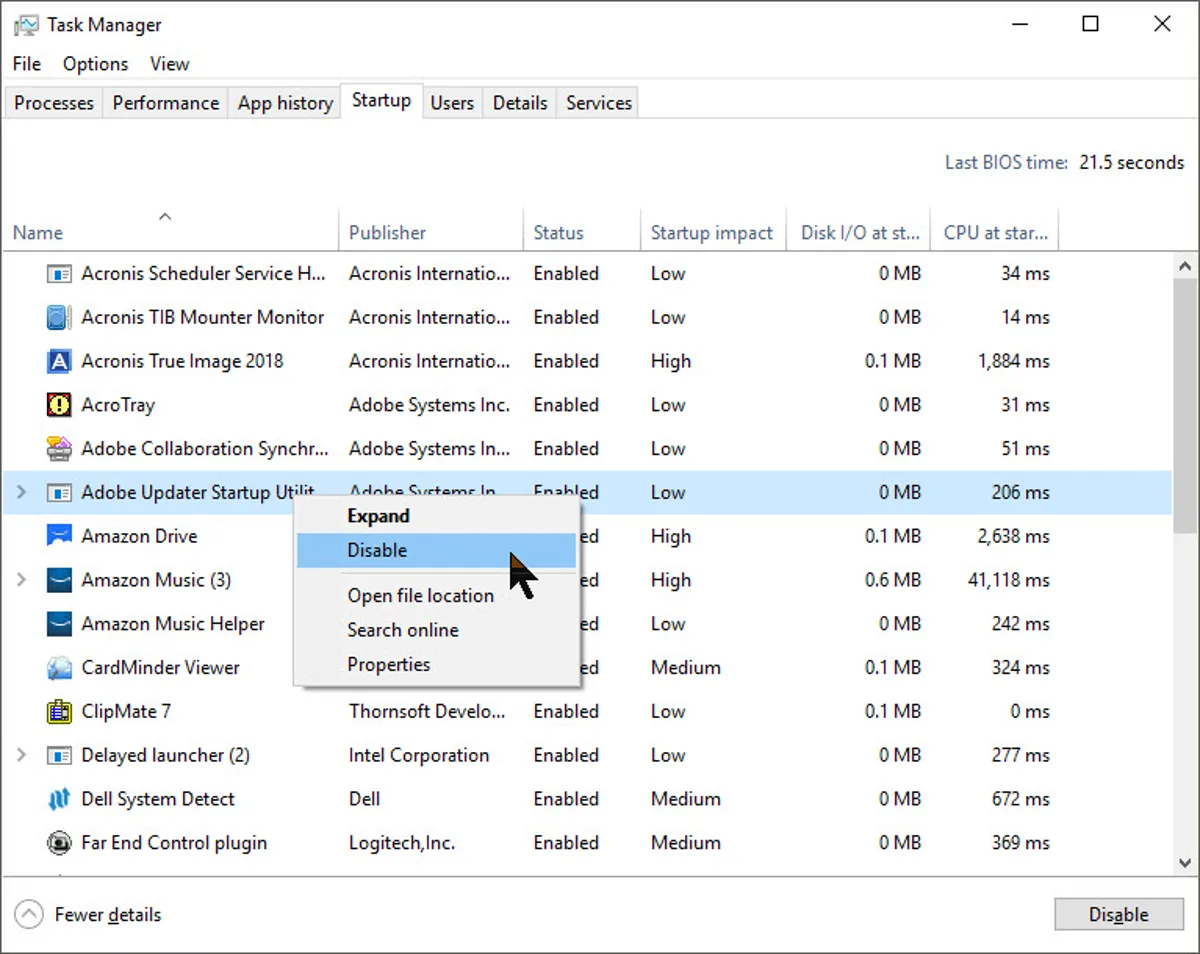
Step 3: On the Task Manager, go to the Startup tab. Here you will find all those apps which trigger when you boot your system and keep running in the background forever.
Step 4: Disable all the rarely used programs or applications that you want to be disabled when your system boots. After selecting the program, choose to Disable. Continue this until you disable all the unwanted programs.
Step 5: After these steps, restart the PC.
Defragment and Optimize Drives
These steps can help Windows 10 to improve performance by optimizing your drives and local disks on Windows 10. Your programs can run much faster and more efficiently because the data will be grouped for easier access. It can also extend your hard drive’s life, give you more efficient security, and reduce overall errors.
“Please Note: If you are using an SSD (Solid State Drive), we recommend you skip this step because, with SSD, it is recommended that you should not defragment the drive as it can cause unnecessary damage, and reduce its lifespan.”
Step 1: Go to your search box and search for ‘Defragment and optimize drives.’ Click to get into the Microsoft Drive Optimizer utility.
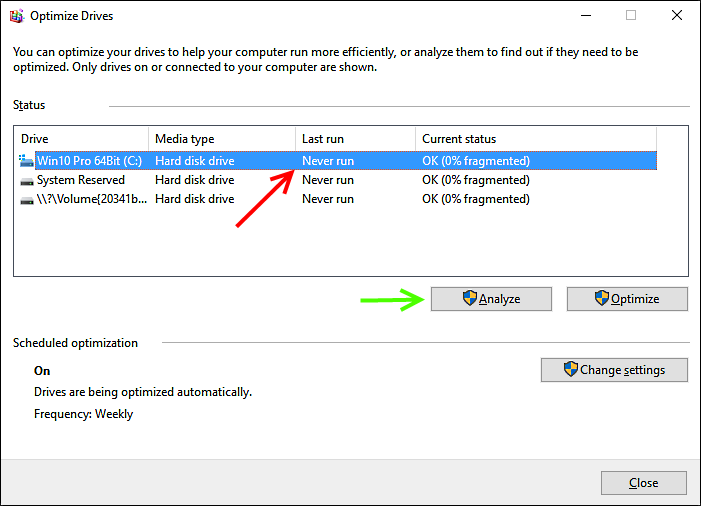
Step 2: Select your C: Drive and click on the Analyze button. Once done, click on the Optimize button to defrag the fragmented sectors.
Step 3: Now select all the drives one by one, and follow the same steps. Once done, close the window and restart your computer.
Use the Best Duplicate Files Fixer
Duplicate files take up a lot of space on your storage and clutter your device. It is recommended to use the best duplicate files finder and remover for Windows to quickly find and remove all the duplicate files.
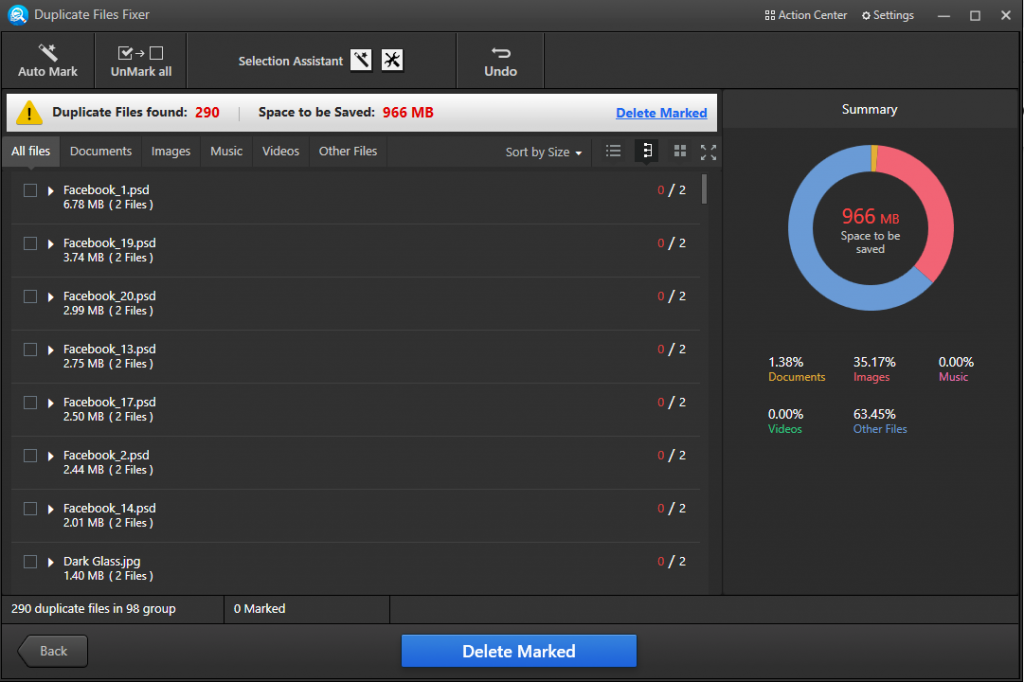
Duplicate Files Fixer is one of the best duplicate file finders and removers for Windows 11 and earlier versions. It is also compatible with macOS 10.8 and above, and Android 4.0 and above versions. It is the smartest utility to quickly find and remove duplicate files, docs, images, archive files, music, videos, and other file formats. You can scan your internal/external HDD, SSD, 4K Drive, USB Stick, SD Card, or cloud storage drives like Google Drive or Dropbox.
Summing Up
Sometimes our computer does not run as fast as we would like it to or as quickly as it did in the past. The methods and the steps shown in this article will help you access the maximum speed without using a PC booster. There are multiple Advanced System Optimizers available to boost system performance. You can automate the process and enjoy the best performance.
