

Any laptop or desktop without internet is incomplete. Most of our tasks are done only when we are online. If your MacBook is not connected to Wi-Fi, it’s hard to use apps and programs without the internet. There are different scenarios of Wi-Fi not connecting on Mac. If you are trying to connect to a public Wi-Fi, you need to ensure that you have the right credentials and access to connect.
While connecting to your regular home network, the troubleshooting steps will be different. You can diagnose your network connectivity manually or use the Best Wi-Fi Analyzer Apps for Mac. If there are other devices available, it will be easy to diagnose if the issue is with the network or the MacBook. Let us explore the manual steps to diagnose Wi-Fi not connecting on Mac issues.
Try Establishing a Wired Connection
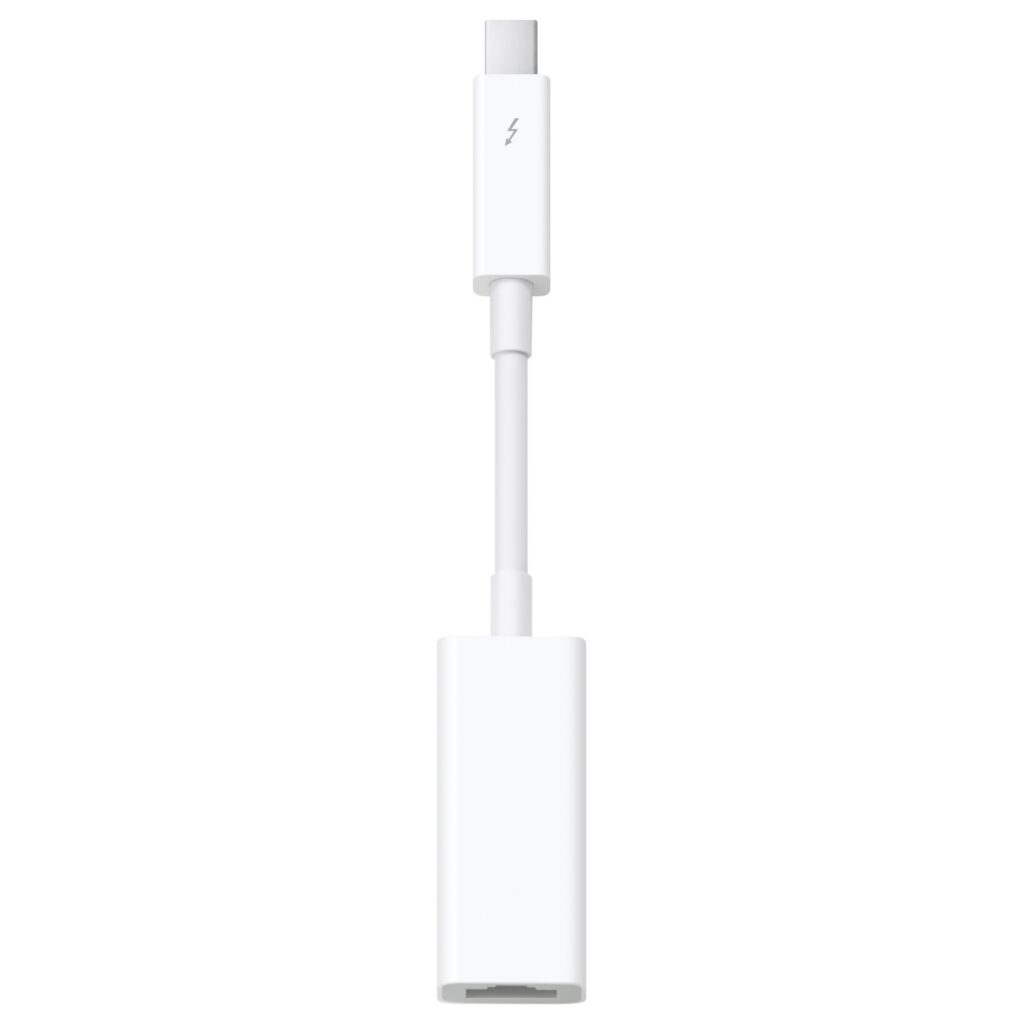
If you have the Apple Thunderbolt Ethernet adapter available, you can try establishing a wired network connection. It will help us better in further diagnosing and fixing the MacBook not connecting to the Wi-Fi issue. If you are able to connect with a wired connection, that means there is no issue with the router or ISP. The problem is with the Wi-Fi settings, Wi-Fi drivers, System Updates, or VPN.
Try Connecting Your Mobile Hotspot
Everyone has a single Wi-Fi connection at home. If there are issues with your Wi-Fi connectivity, try connecting to your Mobile Hotspot and figure out if the MacBook settings or drivers are perfect. If it works perfectly with other Wi-Fi connections or a hotspot, the problem can be with your Wi-Fi router, authentication, or ISP. Try connecting other devices to the same Wi-Fi network to diagnose it further.
Install MacOS Updates
If you have missed finishing installing any MacOS updates, go ahead and finish installing the most recent updates. There can be issues due to any pending updates, patches, or pending bug fixes. You will need to connect to a different Wi-Fi connection or establish a wired connection to finish installing the latest MacOS updates.
Step 1. Go to the Apple menu and click on System Settings or System Preferences.
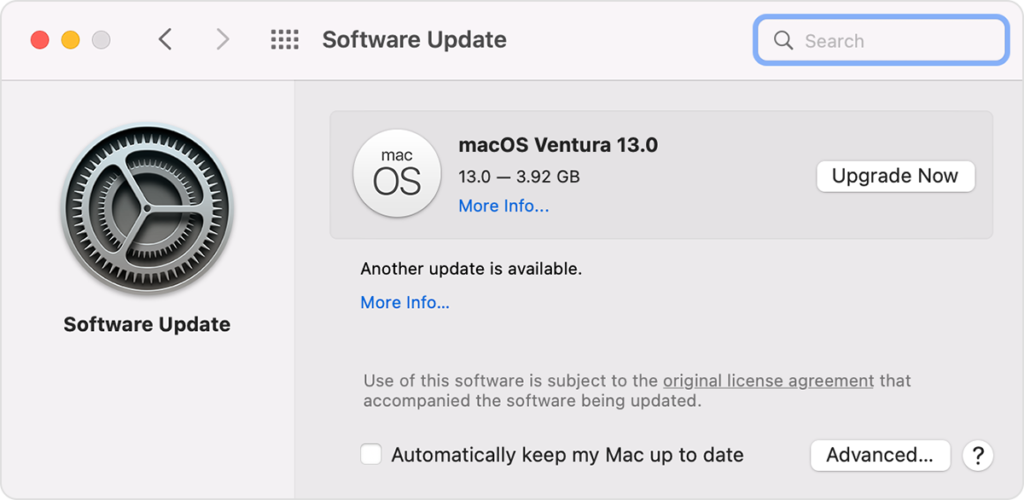
Step 2. Click on Software Update or on the General tab, select Software Update.
Step 3. Click on the Update Now or Upgrade Now button to check for the latest updates.
Restart Your Mac
Restarting your Mac can fix most of the connectivity issues. your Wi-Fi may stop working due to some conflict in settings or faulty DNS settings. When you restart your Mac, it automatically renews the IP and DHCP address. Any software or network conflict can be resolved just with a simple restart.
Reset IP Address
You can also renew the IP address and DHCP server manually with a few clicks. Resetting the IP address can resolve the connectivity issues and give it a fresh start. For more advanced settings on your IP address, get in touch with your ISP and get specific settings.
Step 1. Go to the Apple menu and select System Settings.
Step 2. Select the Network option in the left panel to explore network settings.
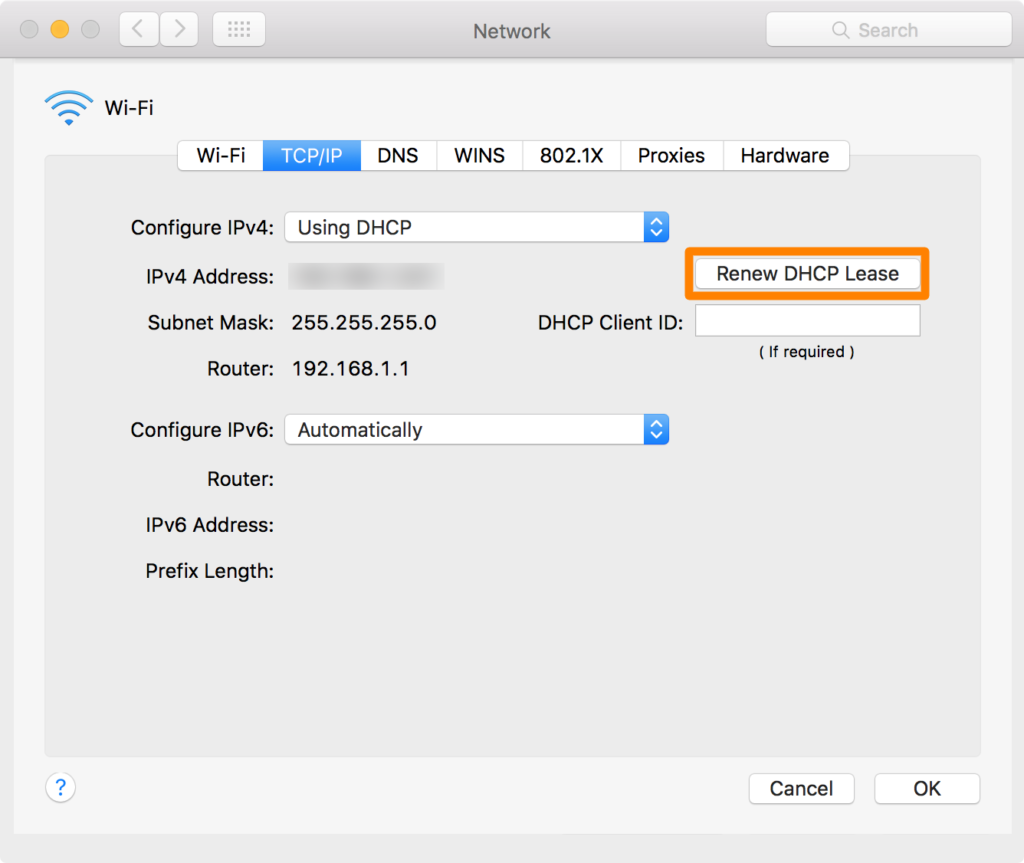
Step 3. Click on the network setting that you wish to reset. Click on the Advanced option to change settings. Click on the TCP/IP and select Renew DHCP Lease.
Step 4. Click on Okay and exit the window.
Check for Security Blocks
Some antivirus and security software has this feature to block unwanted and unknown connections. If you are trying to connect to public Wi-Fi and your MacBook is not connecting to Wi-Fi, you should check for the blocks. You may need to disable the firewall and check if there is any block. Checking VPN settings will also resolve the network connection issue.
Run Wireless Diagnostic Tool
Windows and MacOS have their own network diagnostic utilities. You can initiate the network diagnostic tool to check for issues with your wireless network.
Step 1. Hold down the Option key and click on the Wi-Fi icon in the Control Center.
Step 2. Click on the Open Wireless Diagnostic tool from the options.
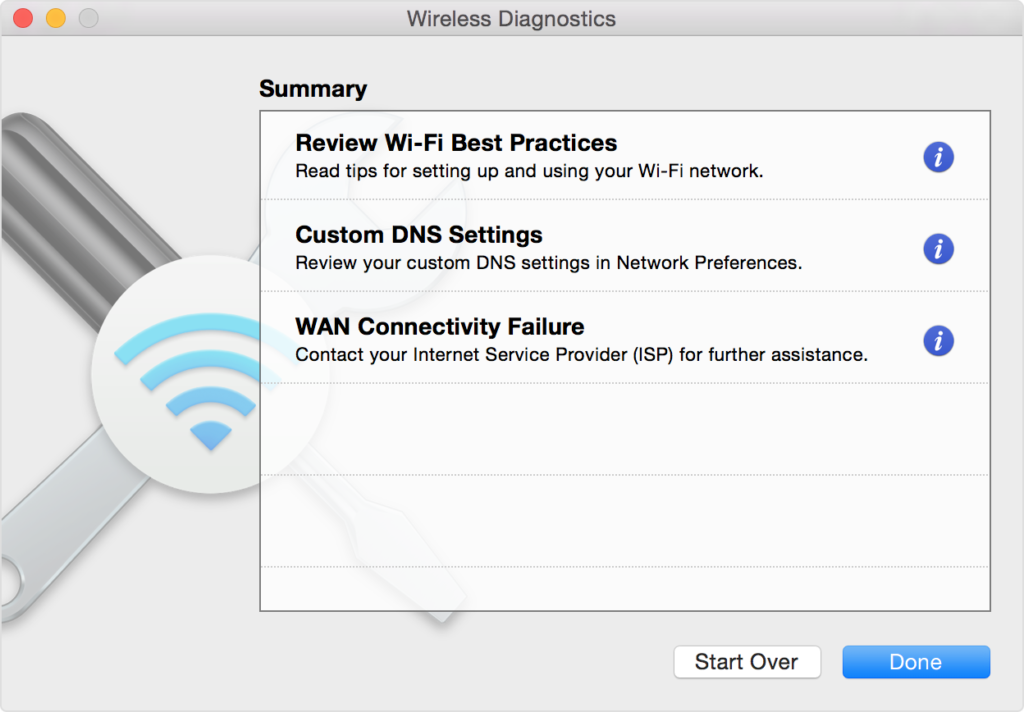
Step 3. Initiate the diagnostic test and review the summary. If there are any custom settings suggested, apply the changes and test your network. Do check for Wi-Fi recommendations to resolve the MacBook not connecting to the Wi-Fi issue.
Update Wireless Drivers
Updating wireless drivers can fix up the Wi-Fi not connecting on the Mac issue. You can manually update the Wi-Fi drivers or make use of the Best Wi-Fi Analyzer Apps for Mac. You can download and update the Wi-Fi drivers manually or use the Best Driver Updater Software for Mac.
Final Words
This article on Wi-Fi not connecting on Mac has the best solutions to fix MacBook not connecting to Wi-Fi. These manual fixes can help you resolve most of the Wi-Fi network failures and will keep you connected all the time. The basic checks and diagnostics will help you identify the root cause of the problem and a quick restart can fix most of the issues.
Author Bio: I am Janny, Tech blogger from India. I like to write about technology and product reviews on windows, android, ios and Mac blogs. Apart from blogging I’m a big Yoga lover. I Love to learn healthy diet recipes and practise new Asanas.
